Lesson 1 · Display Basics
What is this lesson about?
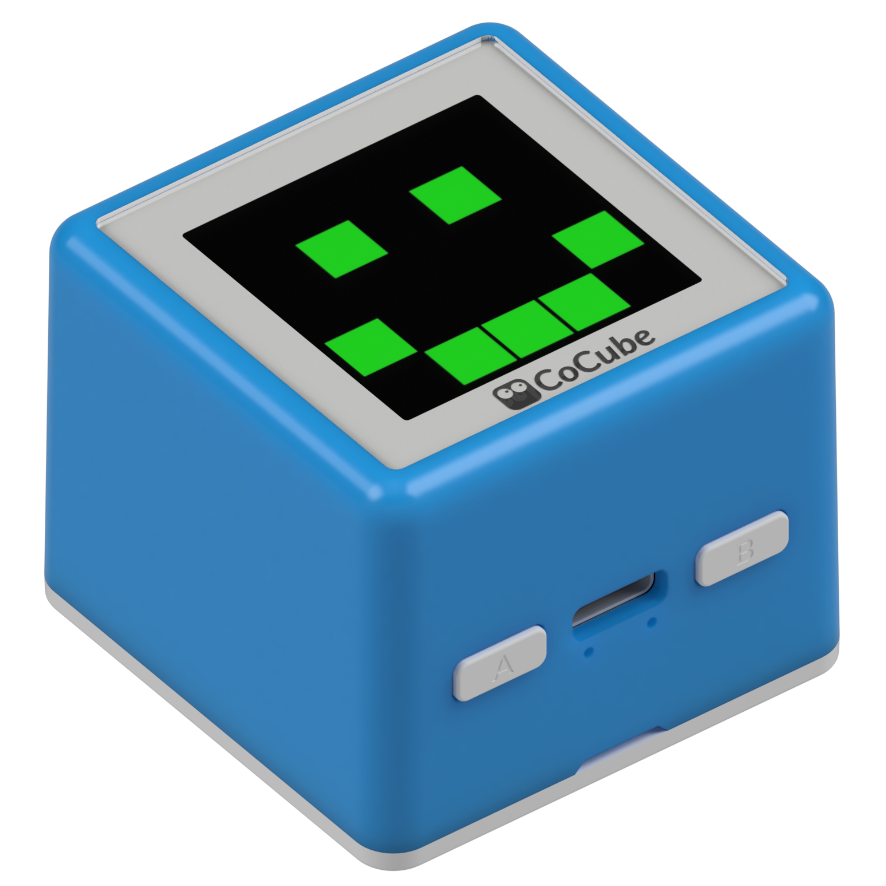
In this lesson, CoCube does not move around yet. It only does one thing: show the result of your code directly on the screen.
The screen is the most immediate feedback window.
Once you can show text, color, and shapes reliably, it becomes much easier to display state later when you add motion, sensing, and task control.
Learning goals
- Initialize the built-in CoCube display
- Use the default font support to show text and simple shapes
- Refresh screen content with variables
- Complete a simple "running lights on screen" challenge
Hardware and APIs used
This lesson only needs the CoCube robot itself. No extra expansion modules are required.
The main APIs used here are:
display.init(): initialize the display and return thetftobject. At the beginner stage you can call it without arguments. It also supports parameters such asrotation,inversion, andcolor_order.display.write(text, x, y, color=display.WHITE, bg=display.BLACK, size="normal", auto_wrap=False): draw text.textis a string,x/yare coordinates,coloris the text color,bgis the background color, andsizecan besmall,normal, orbig.display.measure(text, size="normal"): measure the text width, useful for centering.tft.fill(color): fill the whole screen with one color. Common values aredisplay.BLACK,display.BLUE, and other display color constants.tft.fill_rect(x, y, w, h, color): draw a filled rectangle.x/yare the top-left corner,w/hare width and height.tft.fill_circle(x, y, r, color): draw a filled circle.x/yare the center andris the radius.
First, understand what this capability means
The CoCube screen resolution is 240 x 240.
When you write screen code, these rules are enough to remember at first:
- The top-left corner is the origin, or
(0, 0) - Larger
xmeans farther to the right, largerymeans farther down - Before drawing new content, you usually clear the screen first or cover the old area
- The current firmware already includes the default Chinese font, so
display.write()can show both Chinese and English directly
Start coding
1. Show one line of text and one shape first
Run the smallest possible program first to confirm that the screen works.
import display

tft = display.init()
tft.fill(display.BLACK)
display.write("Hello, CoCube", 24, 40, display.YELLOW, display.BLACK)
tft.fill_circle(120, 128, 24, display.CYAN)
This program does three things:
- initialize the display
- clear the background to black
- show one line of text, then draw a circle
2. Turn a static screen into a changing status card
Next, put a variable on the screen so that the content changes with the program.
import time
import display

tft = display.init()
tft.fill(display.BLACK)
display.write("Counter", 72, 30, display.GREEN, display.BLACK)

for count in range(1, 7):
    tft.fill_rect(24, 92, 192, 56, display.BLUE)
    text = f"Run {count}"
    x = (display.WIDTH - display.measure(text, size="big")) // 2
    display.write(text, x, 104, display.WHITE, display.BLUE, size="big")
    time.sleep_ms(500)
If you want to keep modifying it, try these three things first:
- change the title to your own name or task name
- change the background from
display.BLUEto another color - increase the
range(...)value and watch how the count changes
What should you observe while it runs?
When you run the programs above, focus on these points:
- when the text coordinates change, the display position changes immediately
- the background color and text color together determine whether the screen is readable
display.measure()helps you place changing content more neatly- every time you redraw the rectangle area, the old number is covered
- if you do not cover the old area first, changing content will overlap
Common issues / reminders
- If the screen does not respond, first check whether
display.init()was called - If text is cut off, first check whether
xandyare too close to the edges - If refreshes leave trails behind, clear the screen first or cover the old area with
fill_rect() - In this lesson, aim for stable display first; you do not need a complex layout immediately
Challenge: build a "running lights" screen
In the introductory activities of cocube-learn, "running lights" is a great task for practicing display rhythm.
In CoCube MicroPython, you can think of it as "lighting up a 5 x 5 grid on the screen one cell at a time."
You can build it with this idea:
- draw a
5 x 5grid area first - light up only one small square each time
- move from left to right and top to bottom
- restart after the last square
If you want to keep extending it:
- shorten the wait time to make the "flow" faster
- change the colors to red, green, blue, or your own custom colors
- add a line of text above the grid to turn it into a status banner
Reference code
import time
import display

tft = display.init()

bg = display.BLACK
border = display.color565(240, 210, 80)
off = display.color565(20, 40, 20)
on = display.color565(80, 255, 40)

cols = 5
rows = 5
cell = 38
gap = 4
left = 12
top = 12
border_w = 4

grid_w = cols * cell + (cols - 1) * gap
grid_h = rows * cell + (rows - 1) * gap
frame_w = grid_w + 2 * border_w
frame_h = grid_h + 2 * border_w

def draw_board(active_index):
    tft.rect(left, top, frame_w, frame_h, border)
    tft.rect(left + 1, top + 1, frame_w - 2, frame_h - 2, border)

    for row in range(rows):
        for col in range(cols):
            x = left + border_w + col * (cell + gap)
            y = top + border_w + row * (cell + gap)
            index = row * cols + col
            color = on if index <= active_index else off
            tft.fill_rect(x, y, cell, cell, color)

while True:
    tft.fill(bg)
    for active in range(cols * rows):
        draw_board(active)
        time.sleep_ms(120)
Quick reference
The most common pattern in this lesson is:
import display

tft = display.init()
tft.fill(display.BLACK)
display.write("Hello", 20, 40, display.YELLOW, display.BLACK, size="big")
display.init(): initialize the built-in displaytft.fill(color): fill the full screen with a background colordisplay.write(...): draw text, with direct Chinese and English supportdisplay.measure(...): measure text width for centered layouttft.fill_rect(...): draw rectangles for backgrounds and status cardstft.fill_circle(...): draw circles for simple icons
If you need more APIs, continue to the display reference.