Set Up the Development Environment
The goal of this page is to get the CoCube MicroPython environment working end to end: the device should connect, flash correctly, show
>>>, and run a one-line test.
Completion criteria
When you finish this page, you should be able to:
- install Thonny on your computer
- flash the matching MicroPython firmware onto CoCube
- connect to CoCube from Thonny and see
>>>in the Shell - run a one-line test successfully
Materials you need
- CoCube robot
- USB data cable
- A computer
- Firmware file
cocube_mpy_xxxx.bin(click to download)
1. Understand the workflow first
For CoCube, you can think of the development flow as two layers:
- First flash the MicroPython firmware onto CoCube
- Then use Thonny to upload
.pyfiles to CoCube and run them
This page focuses on the first layer and the most basic connection check.
The next page covers file management, script execution, and main.py in more detail.
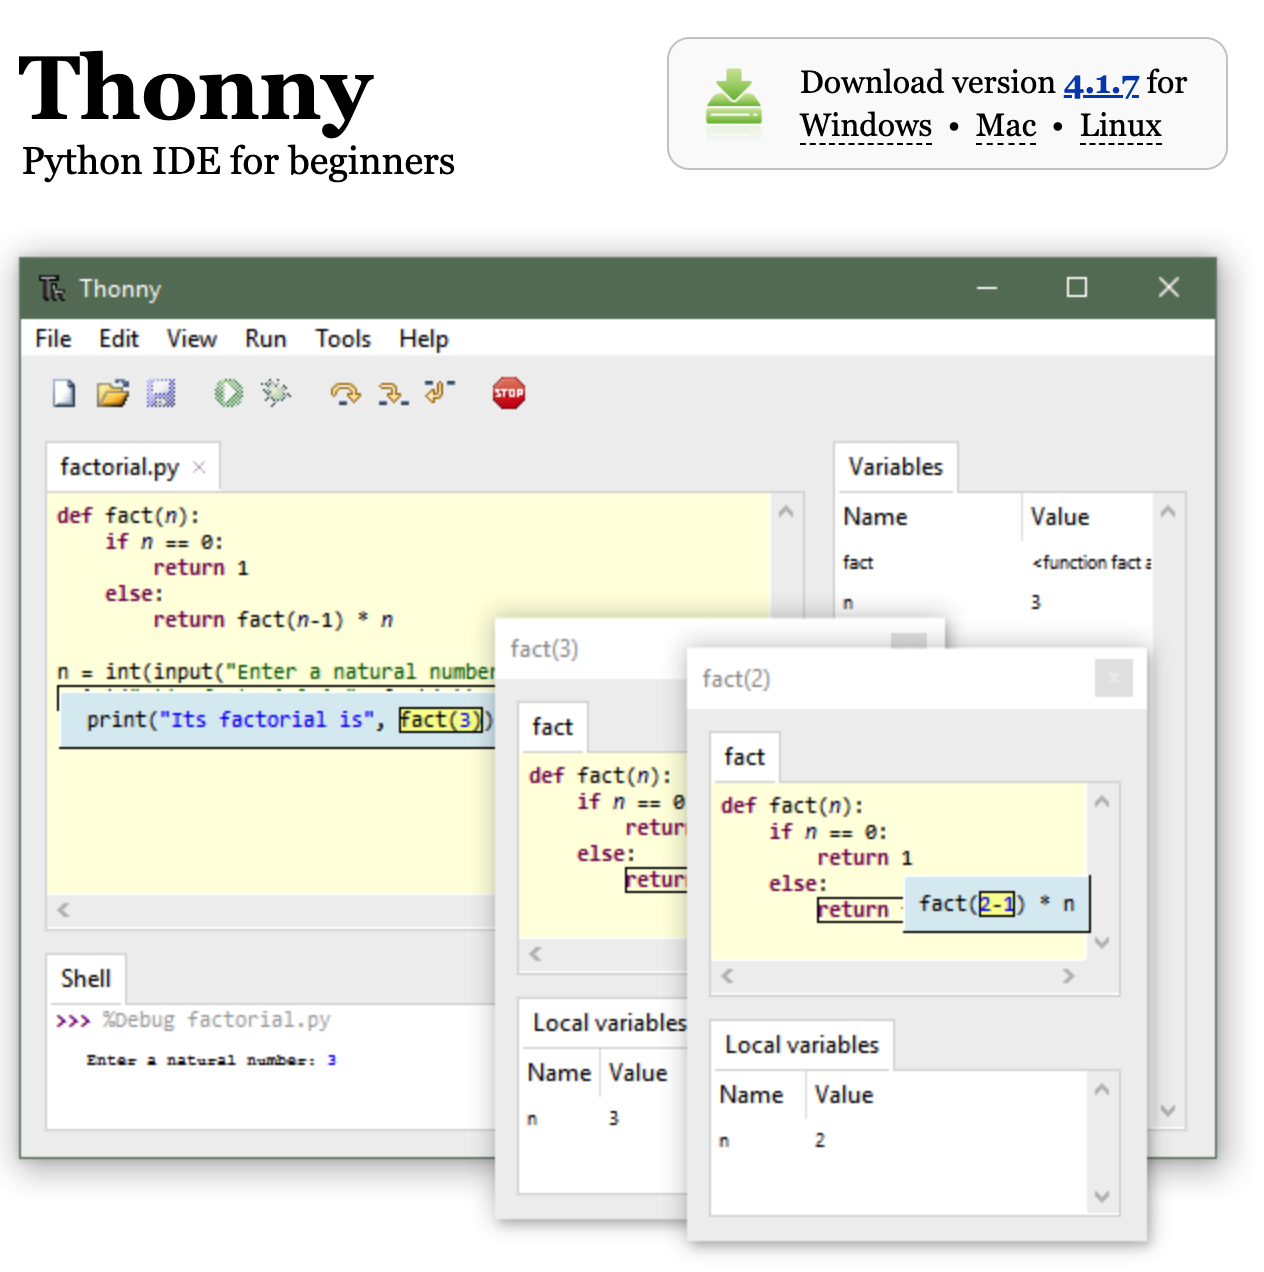
2. Install Thonny
Thonny is the default development tool used throughout this tutorial.
The screenshots, file workflow, and Shell examples later on all assume Thonny.
It is best to prepare both Thonny and the firmware file before you start connecting, flashing, and verifying the device.
2.1 Download and install
Go to the Thonny website to download and install it.
3. Flash the MicroPython firmware
CoCube needs the correct MicroPython firmware before the connection, upload, and run flow becomes stable. The two common methods are kept below.
- Via Thonny (local firmware file)
- Via Espressif Flash Download Tool
This is the most reliable method. You use the local course firmware file directly instead of depending on Thonny to fetch a default firmware online.
-
Prepare the firmware: Download the matching CoCube firmware file first: Download the CoCube MicroPython firmware.
-
Connect CoCube: Hold the bottom power button to turn CoCube on, then connect it to the computer with a USB cable.
-
Configure the interpreter: Open Thonny, click the interpreter status field in the lower-right corner, then choose
Configure interpreter.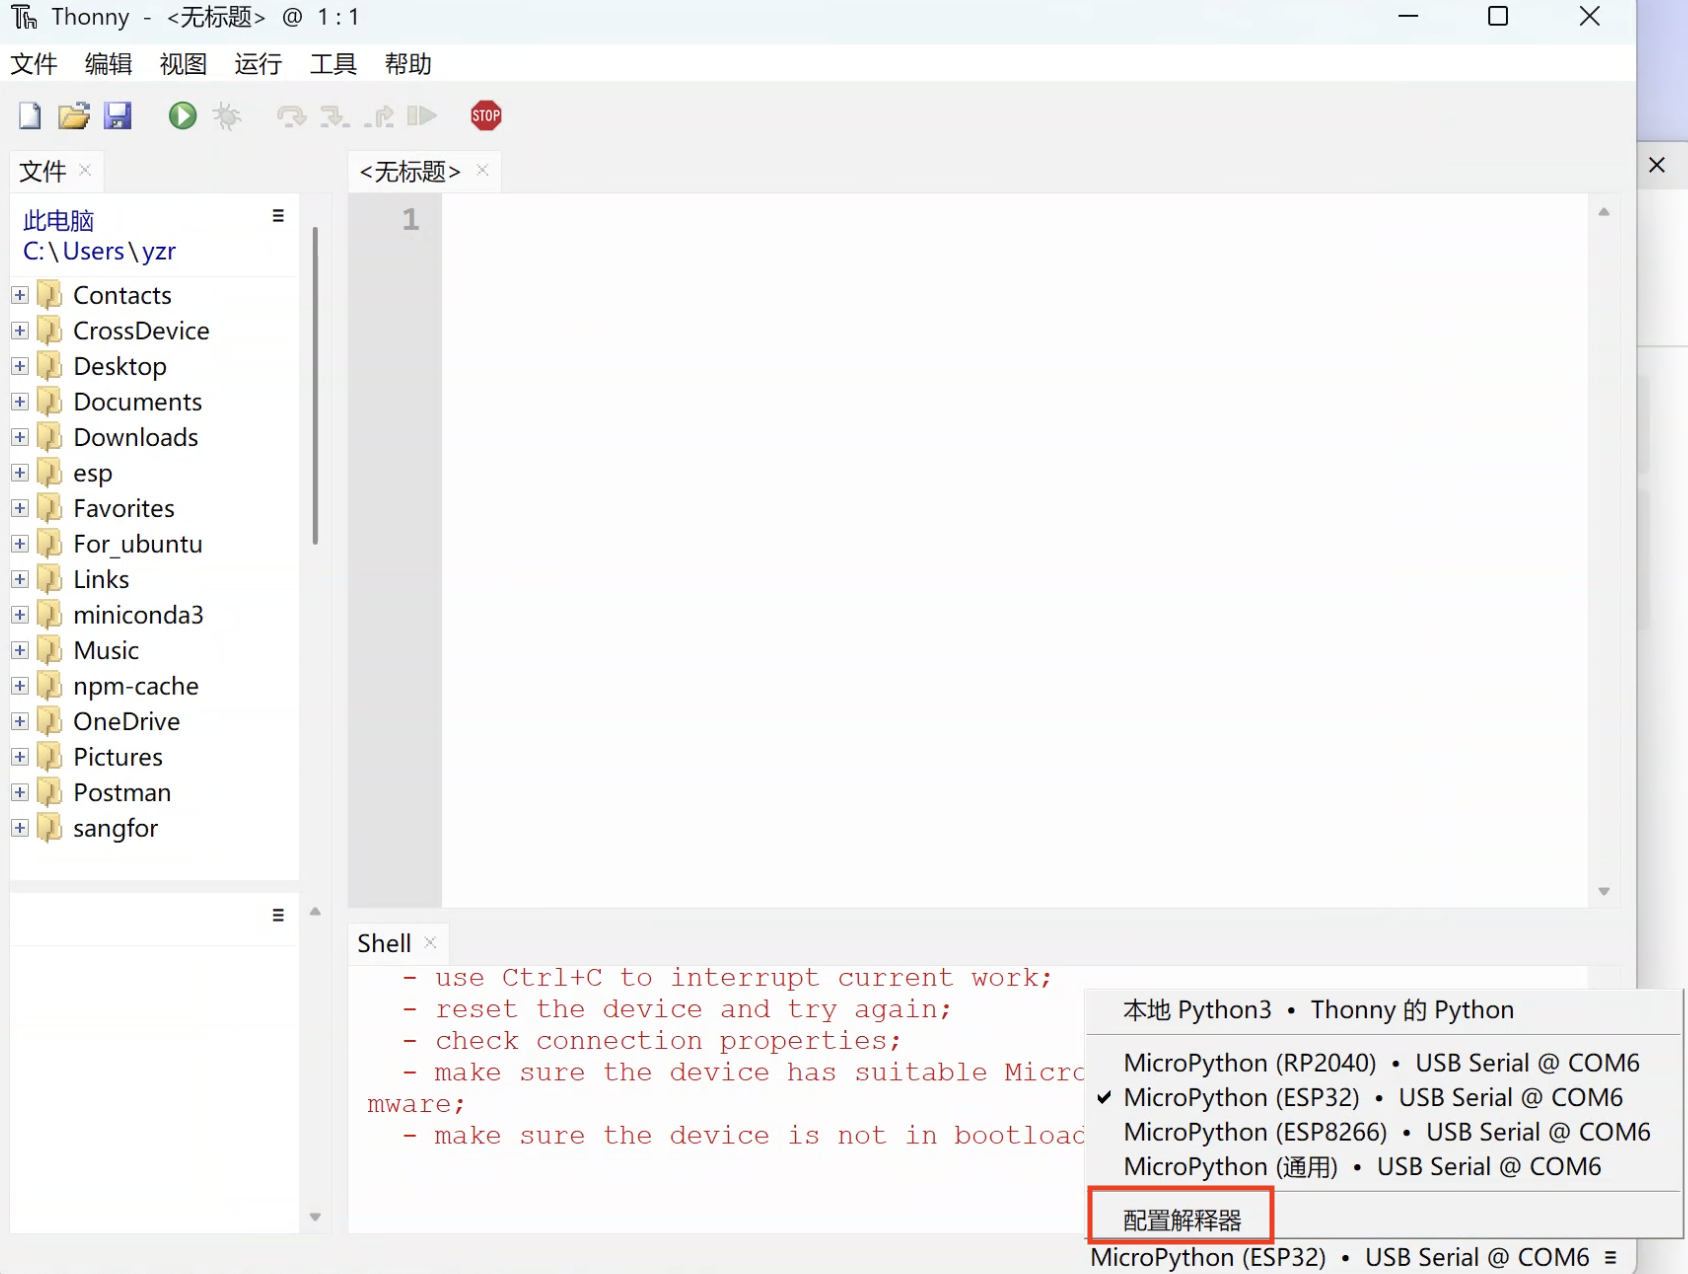
-
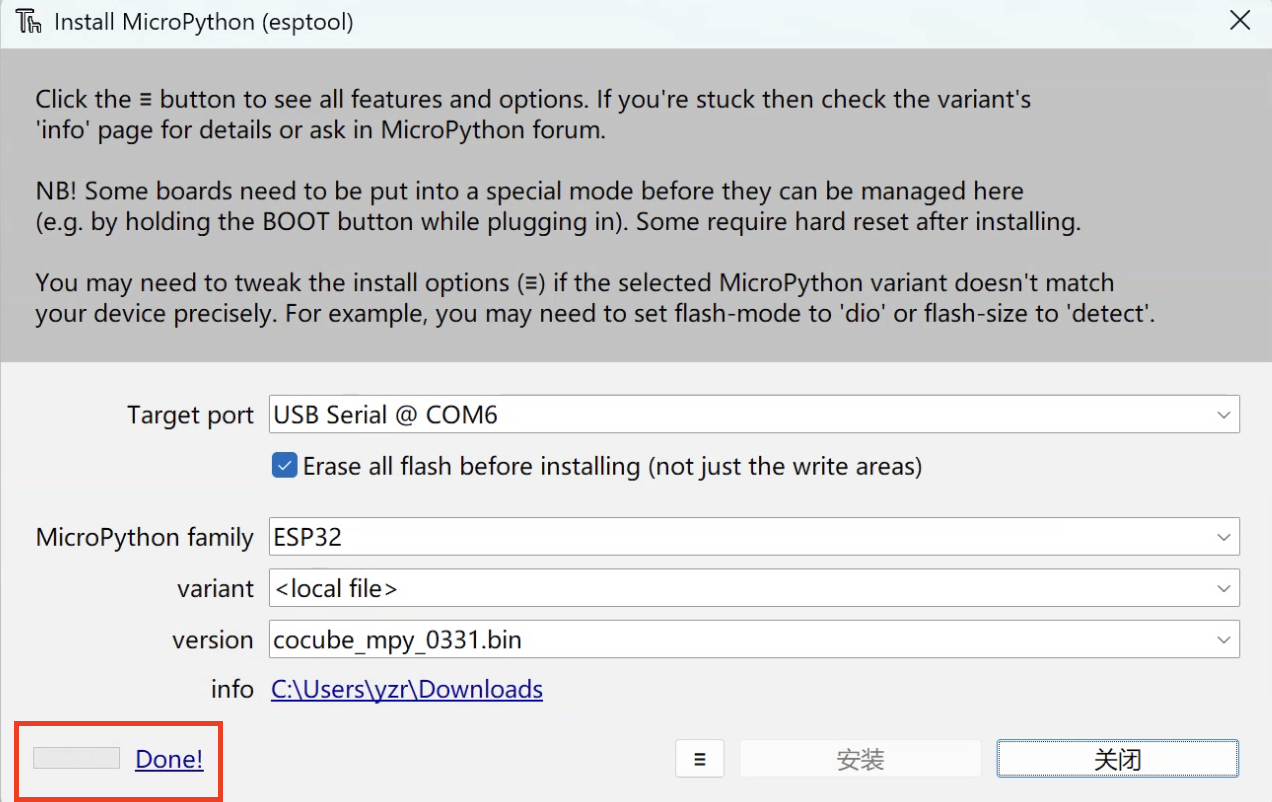
Open the flashing tool: In the popup, choose the
MicroPython(ESP32)interpreter and the device port, then clickInstall or update MicroPython (esptool).
-
Select the local firmware: In the
Install MicroPython (esptool)window, click the☰button in the lower-right corner, then clickSelect local MicroPython imageand choose the CoCube firmware file.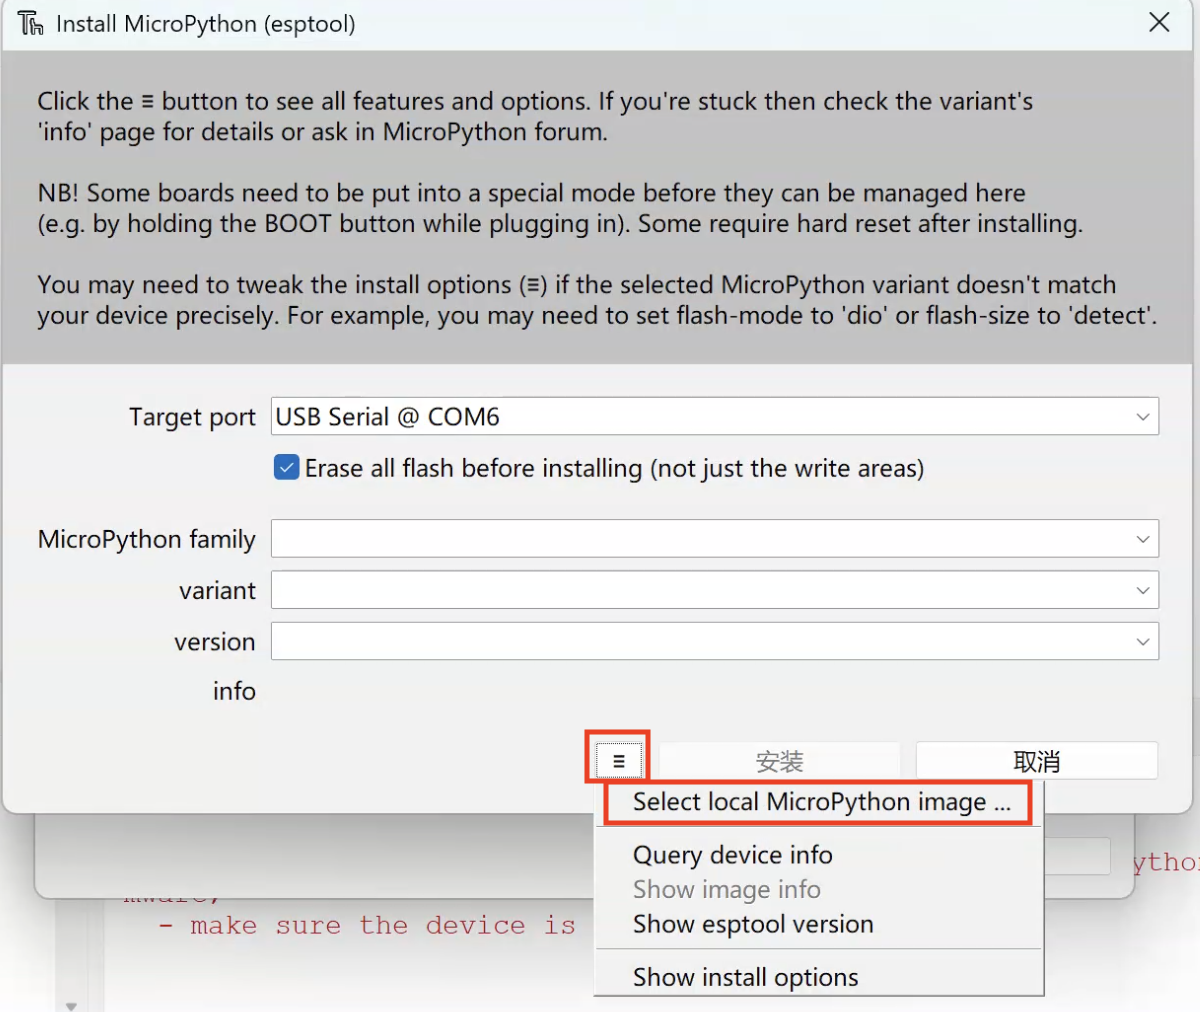
-
Start flashing: Click
Installand wait for erase and write to finish until you seeDone!.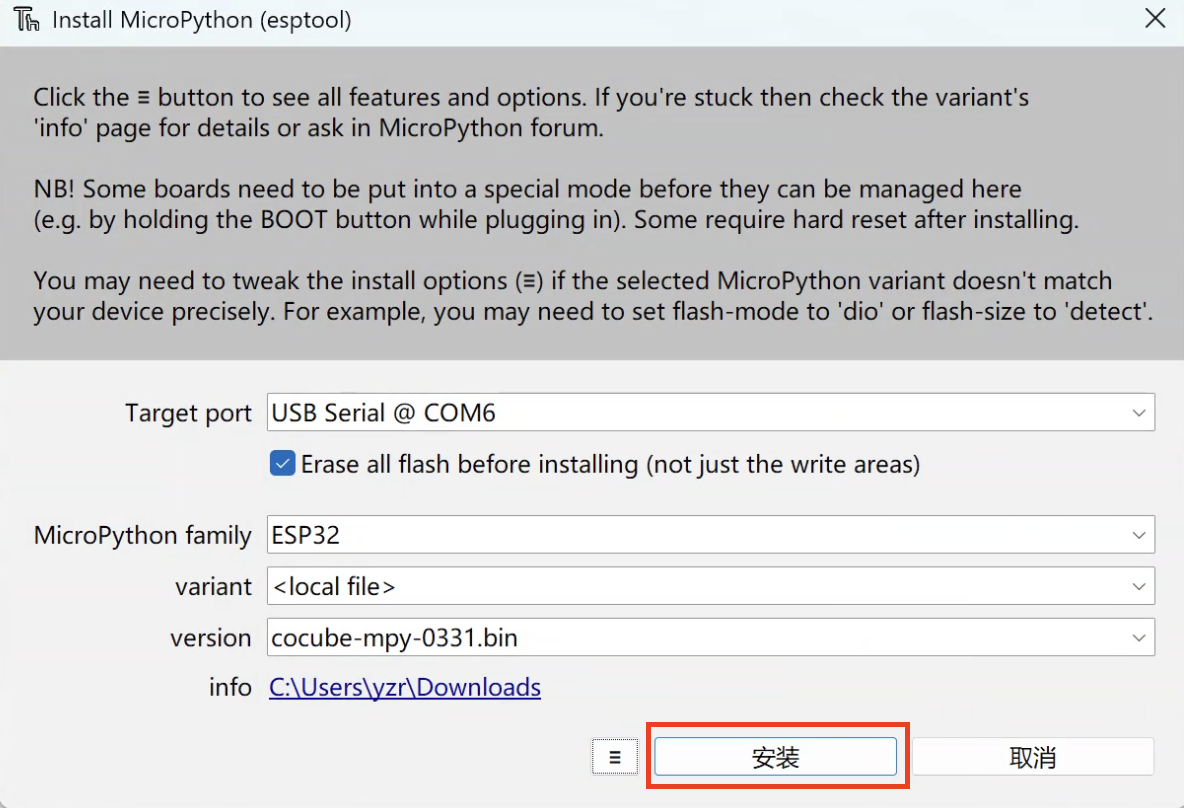
This is the lower-level tool path. It is suitable when you need to set the chip model, address, and baud rate manually.
-
Prepare the firmware: Download the firmware file first: Download the CoCube MicroPython firmware.
-
Download the tool: Download the Flash Download Tool.
-
Open the tool: Extract it and run
flash_download_tool.exe.
- Set
ChipTypetoESP32. - Set
WorkModetoDevelop. - Set
LoadModetoUART.
- Set
-
Set the firmware file:
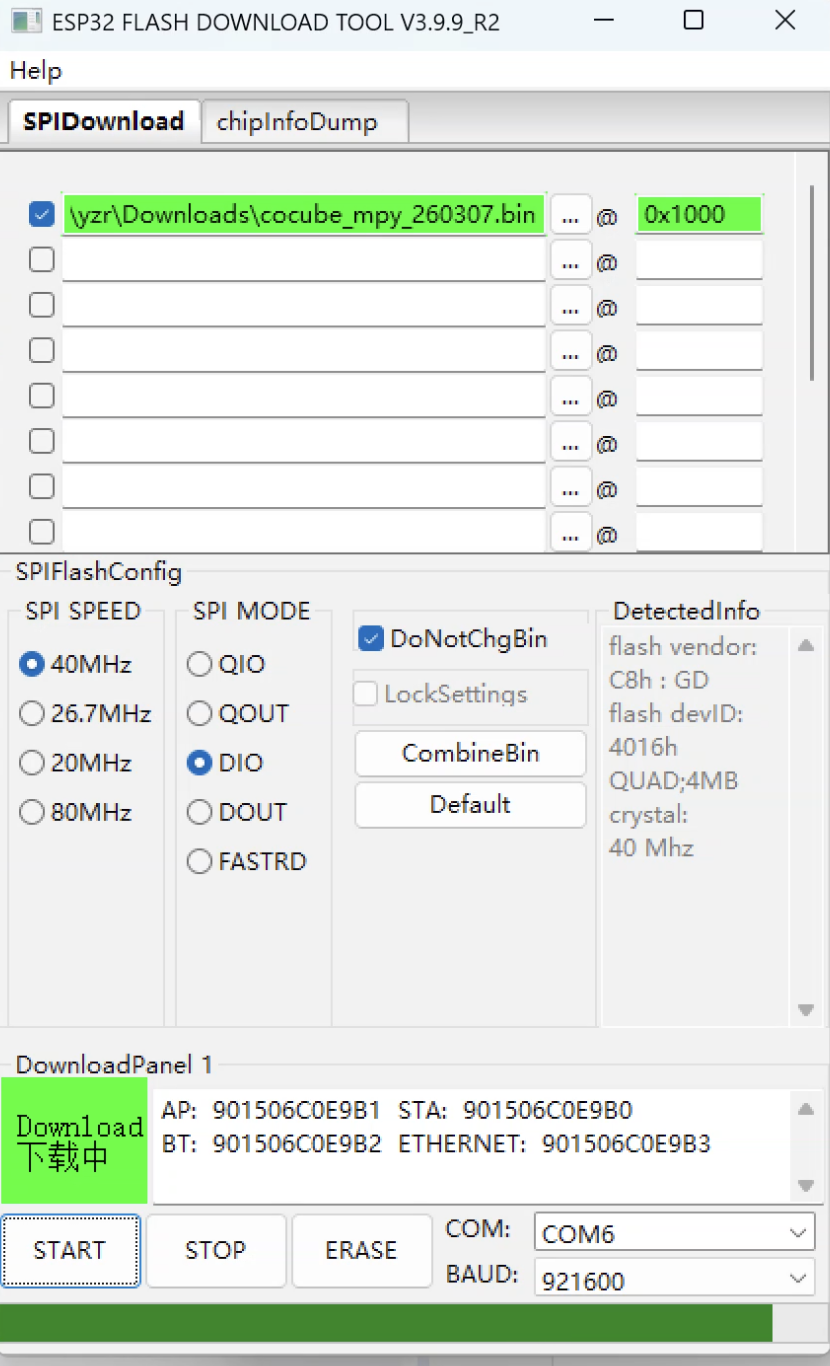
- Click
...to select the.binfirmware file. - Fill in the matching flash address for that firmware.
- Click
-
Flash the device: Select the correct port, set the baud rate, then click
STARTand wait untilFINISHappears in the lower-right corner.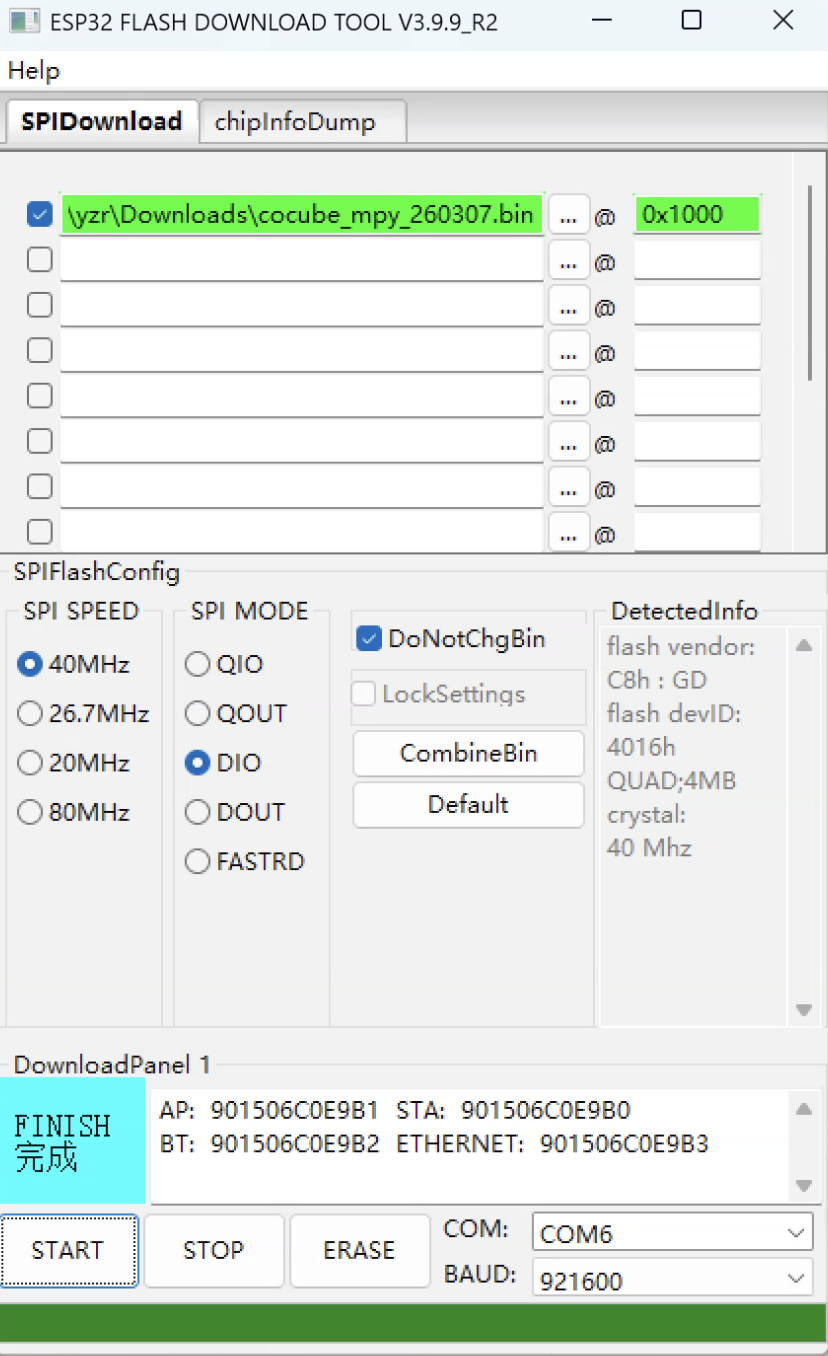 Warning
This method has more configuration items. If the chip model, firmware file, or flash address does not match, flashing can fail or the device may not boot correctly.
4. Verify the environment
After flashing, it is best to verify the environment immediately.
-
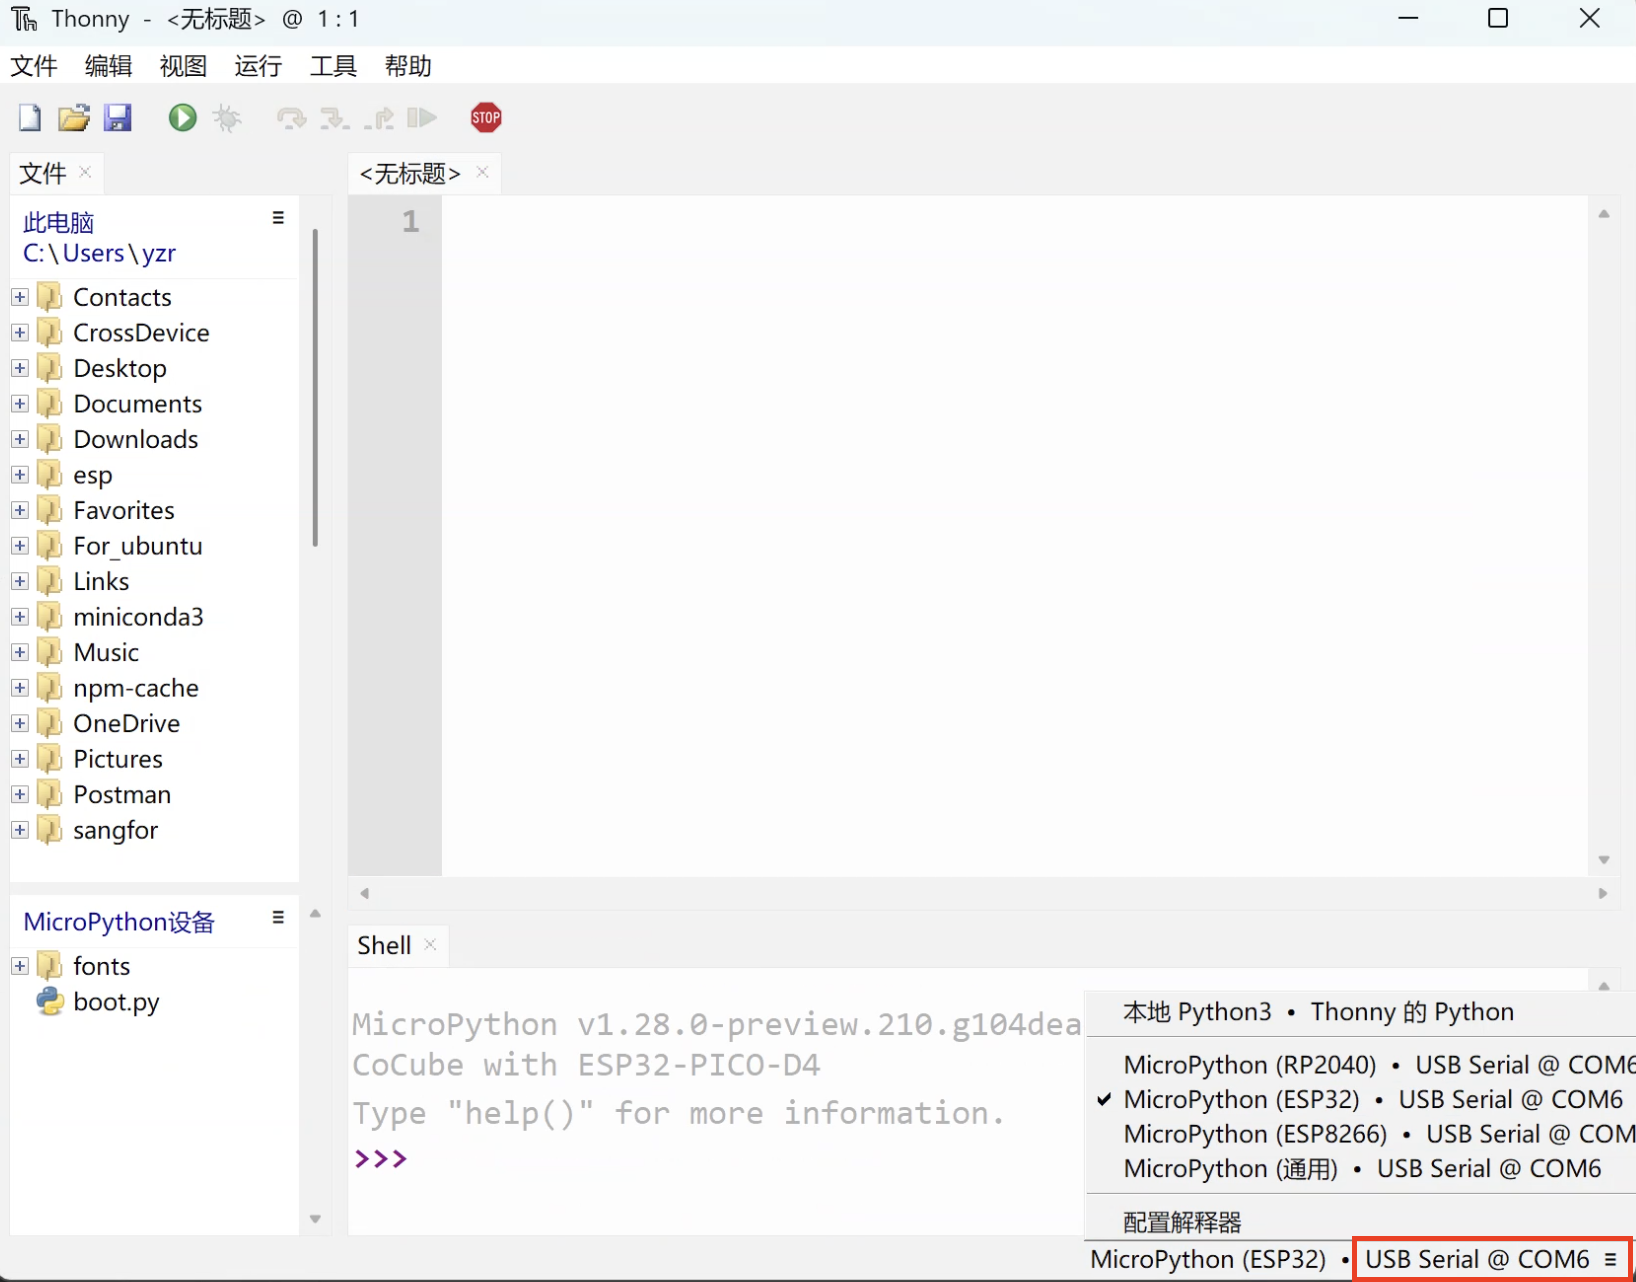
Reconnect CoCube: Unplug and reconnect CoCube, then confirm that Thonny is still set to the correct port and the
MicroPython (ESP32)interpreter in the lower-right corner.ImportantThe device port may change after flashing. If the connection fails, reselect the port first.
-
Restart the interpreter: If the
Shellat the bottom is not responding, click the red stop button in the toolbar to restart the interpreter.
-
Check the REPL prompt: If you see version info and
>>>in the Shell, CoCube has entered the MicroPython REPL successfully.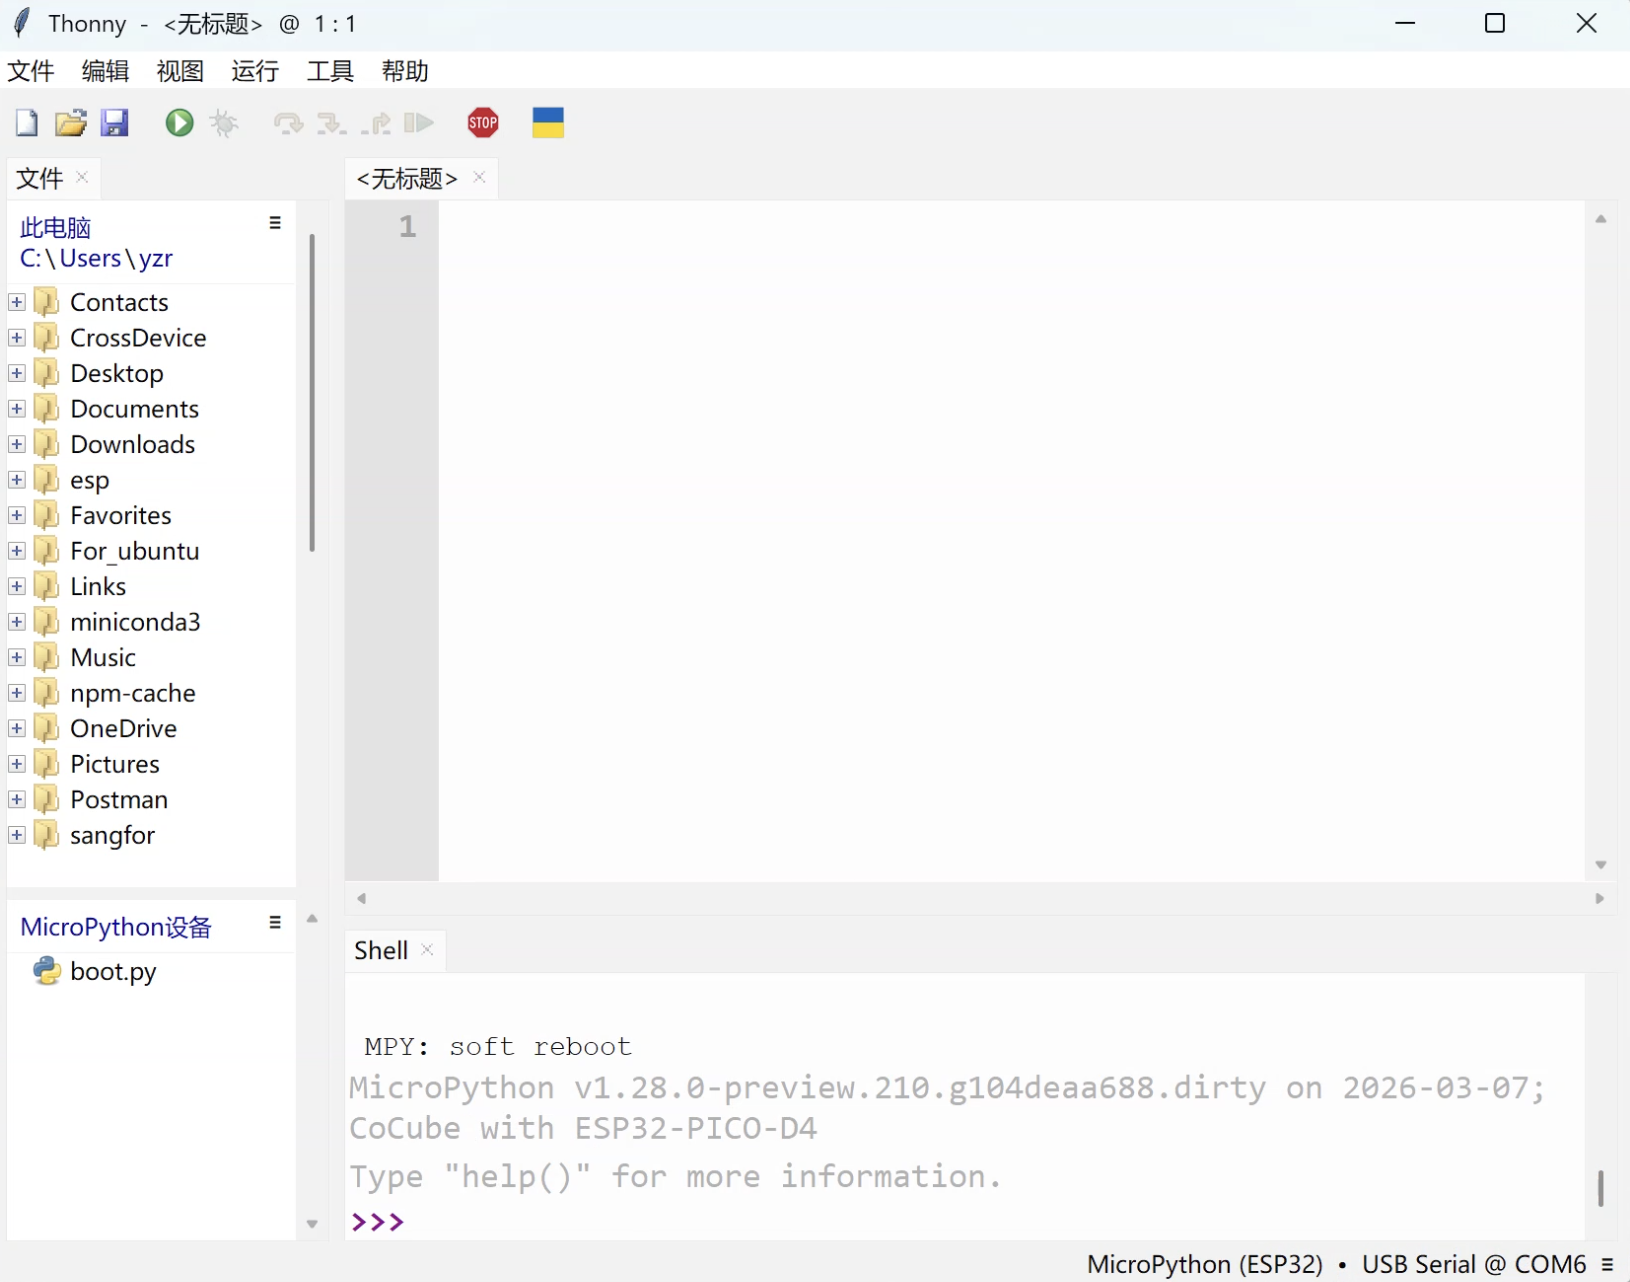
-
Run a test line: Enter a one-line test after
>>>.print("Hello, CoCube!")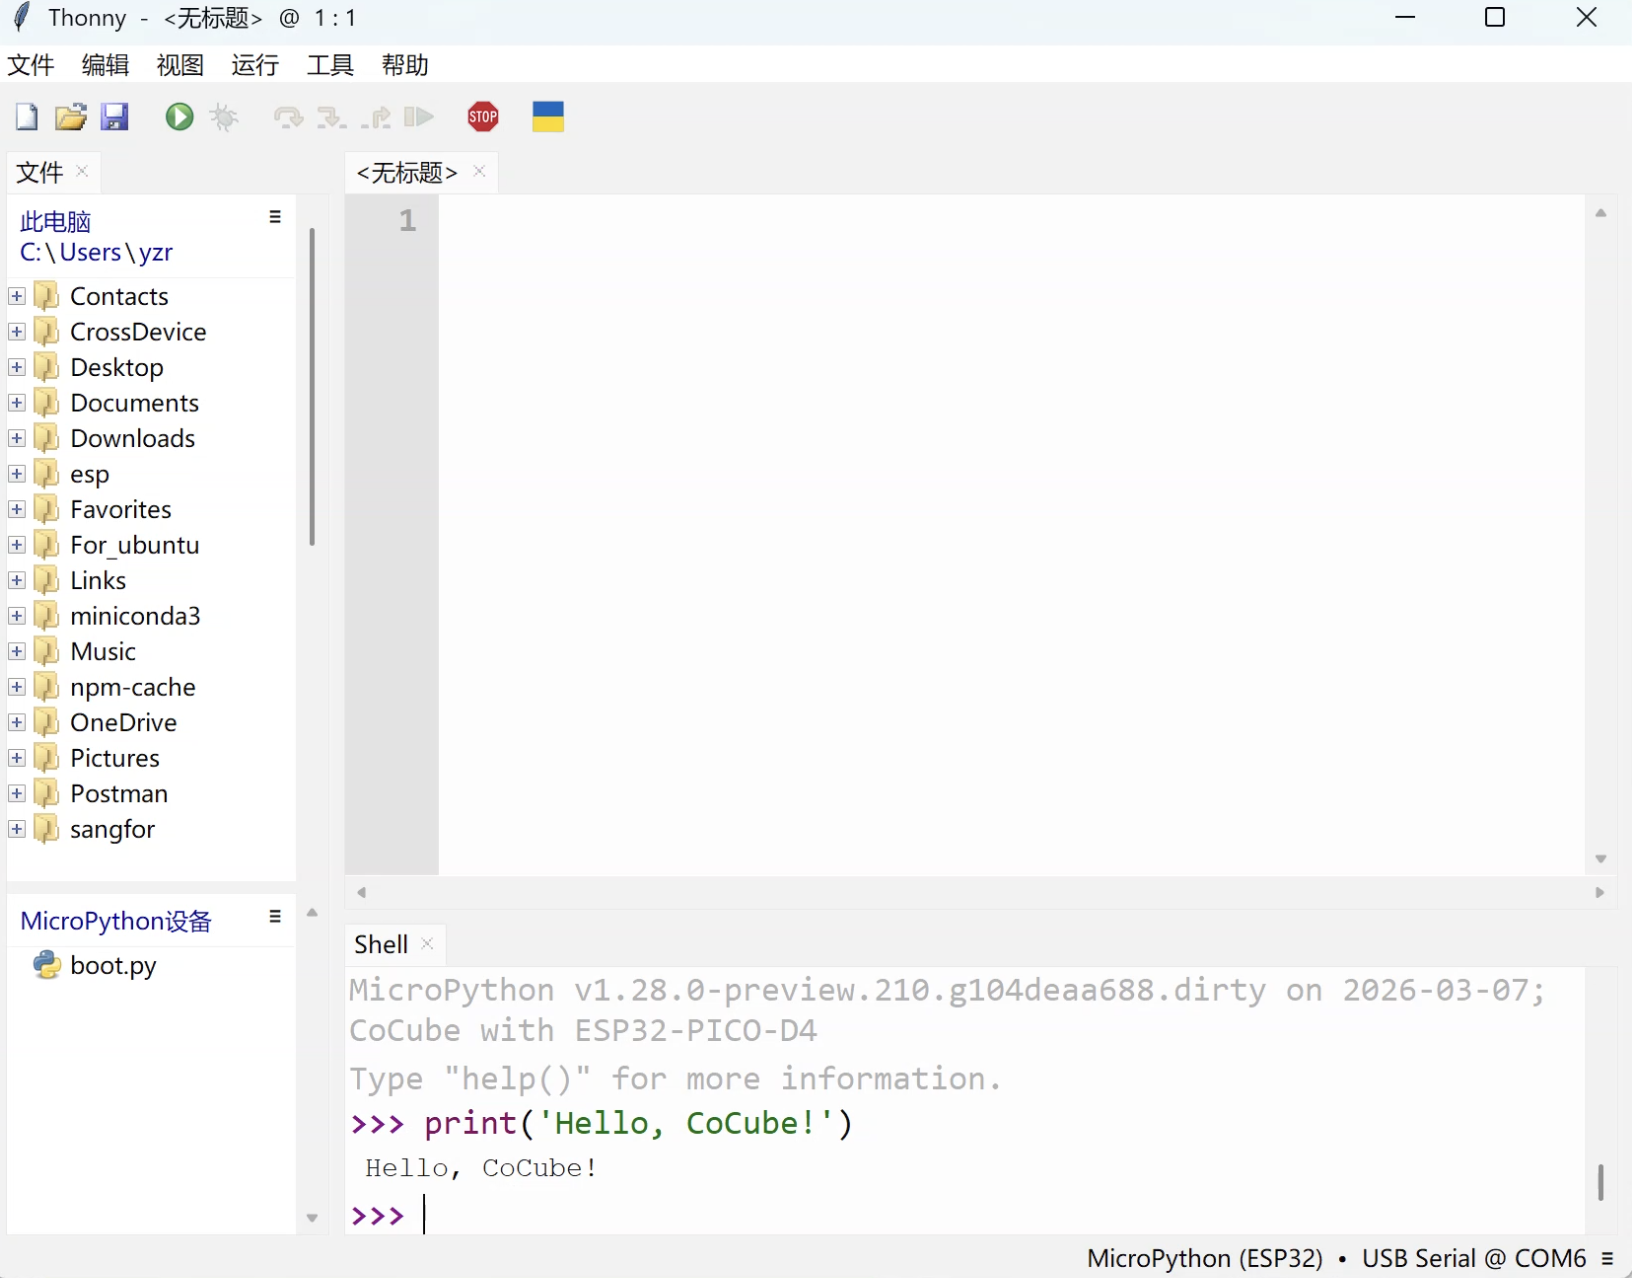
If the terminal prints the output correctly, the development environment is ready.
If you can reliably see >>> and print the test output, the goal of this page has been met.
5. What next?
The recommended next page is Basic Concepts.
That page connects the most common development actions into one flow: viewing files, using the REPL, running scripts, saving to the device, and understanding main.py.