Basic Concepts
This page focuses on the most common entry points first: trying a command in the Shell, running a script that finishes, saving a file to the device, and understanding why
main.pyauto-runs.
After this page, you should be able to
- run a MicroPython command in Thonny's Shell
- tell the difference between "trying something quickly in the REPL" and "saving a script on the device"
- know when
boot.py,main.py, andCtrl + Dare used - continue looking things up with
help("modules"),help(), and the reference docs
Recommended order
- Confirm that the device is online in the REPL
- Run a short script that finishes on its own
- Then look at local files and device files
- Finally understand auto-run behavior and documentation lookup
1. Try one command in the REPL first
REPL stands for Read-Eval-Print Loop.
In Thonny, it is the Shell pane at the bottom, and it is ideal for "try one command and inspect the result."
Enter the following in the Shell and press Enter:
1 + 2 + 3 + 4 + 5
This command is sent to the MicroPython interpreter on CoCube, and the result 15 is printed back in the Shell.
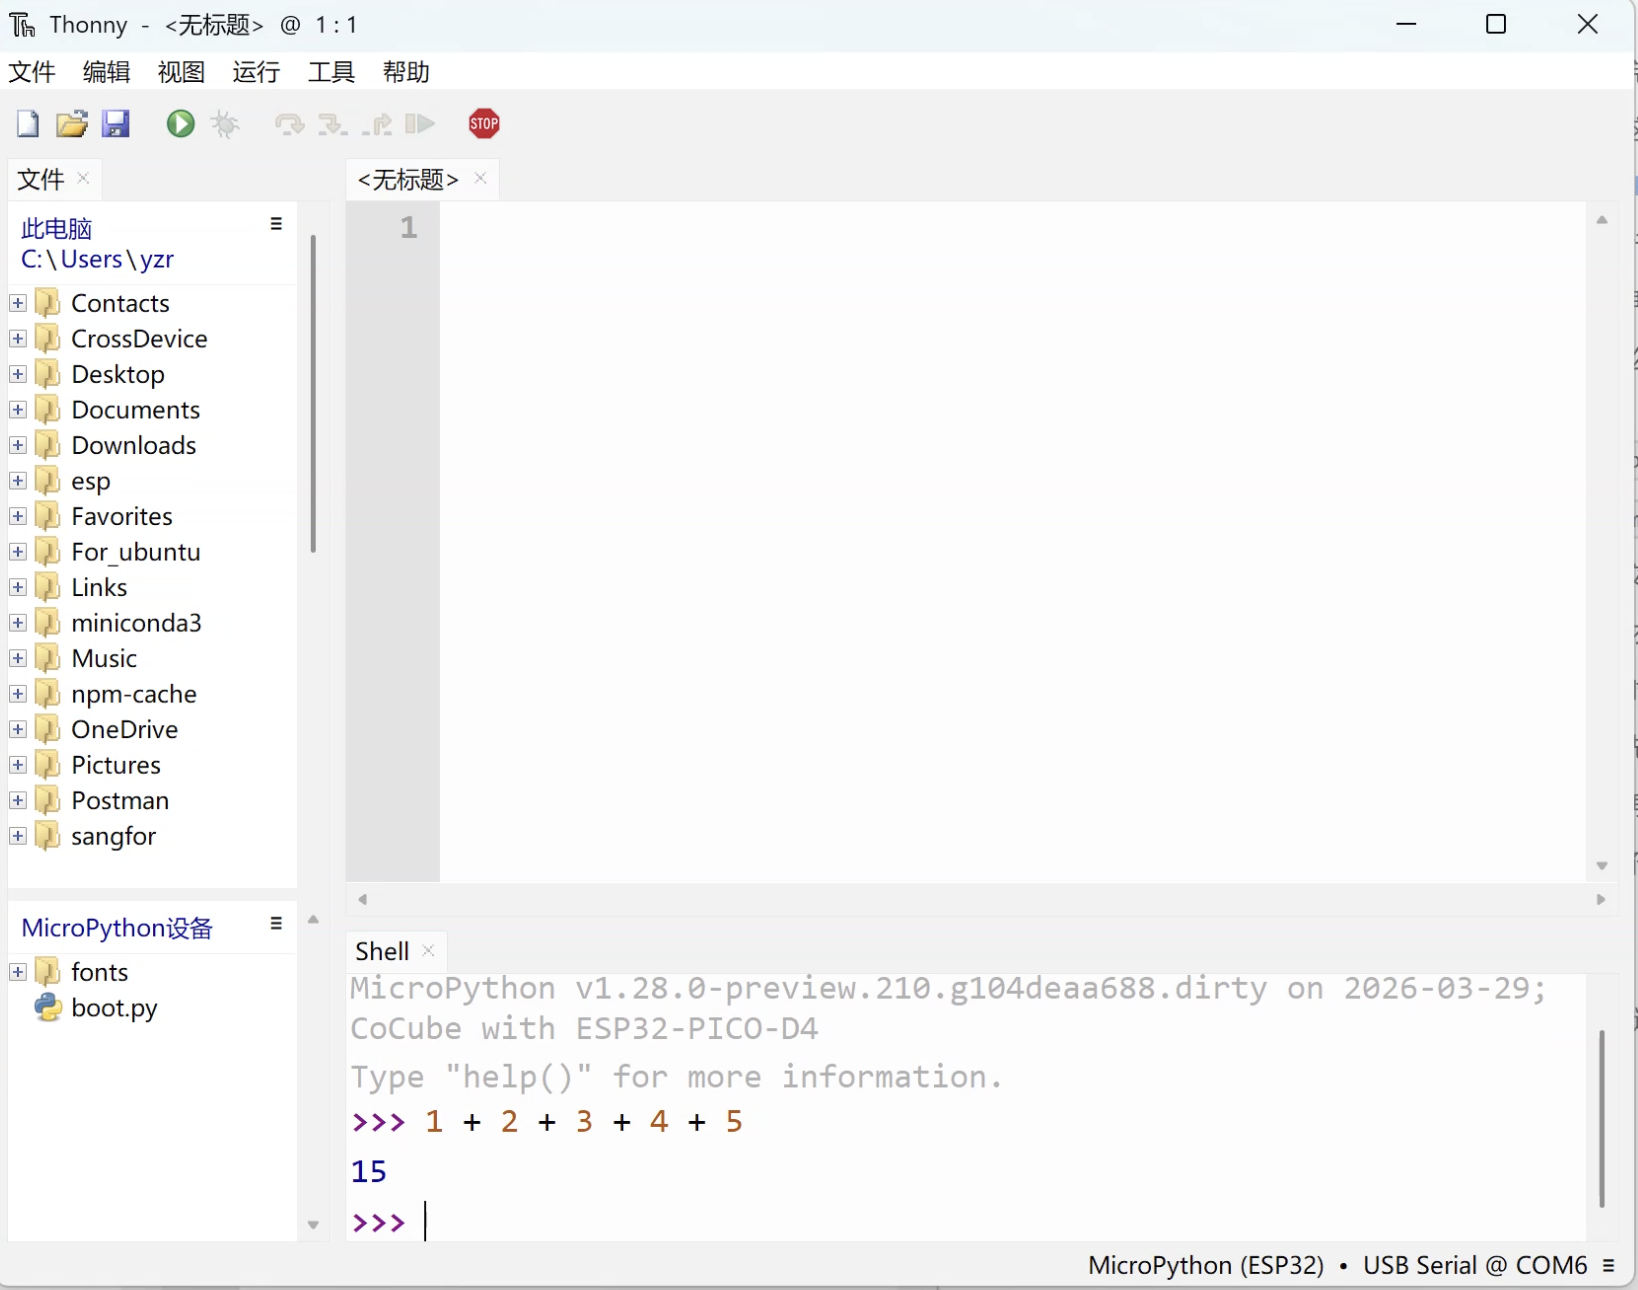
Ctrl + C: interrupt the program that is currently running and return to the promptCtrl + D: perform a soft reboot and run the MicroPython startup flow again
At the beginning, the REPL is very useful for checking a value, trying an import, or confirming whether an object exists.
Code that you want to run repeatedly is usually better written as a script file.
2. Run a short script that finishes on its own
The previous step used the REPL.
Now switch to the editor area and run a short script that can also be saved.
-
Write the script: Enter the code below in the editor.
import time

print("countdown.py")

for remaining in range(3, 0, -1):
    print("starting in", remaining)
    time.sleep_ms(500)

print("done")
print("back to shell") -
Run the script: Click the green
Runbutton in the toolbar, or pressF5.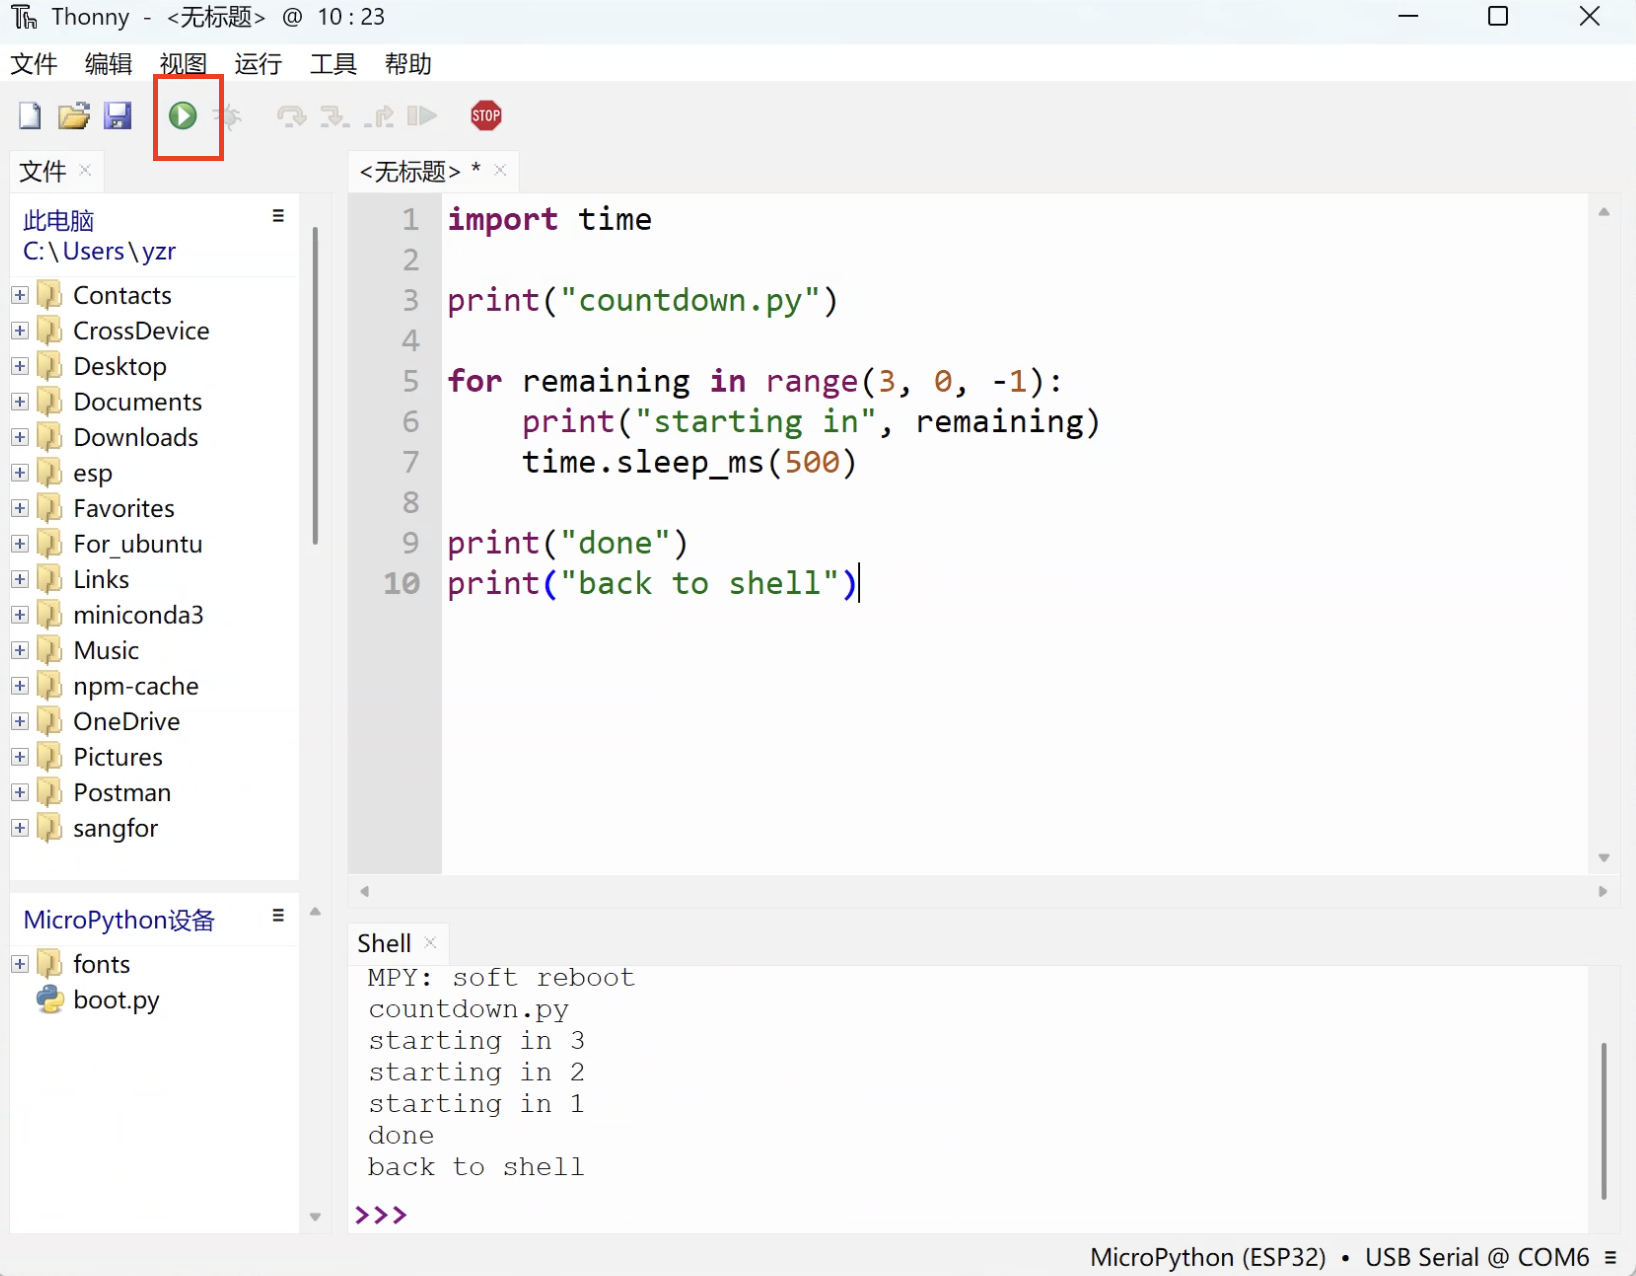
-
Observe what happens: The Shell prints the countdown 3, 2, 1, then the final messages, and finally returns to the
>>>prompt.
This example intentionally uses only the time module and does not enter an infinite loop.
That makes it easier to see the difference between "running a script" and "returning to the Shell when it finishes."
If you later write a program that does not end by itself, you can interrupt it with the toolbar stop button or Ctrl + C.
3. Now look at local files and device files
Just because a script exists in the editor does not mean it has already been saved onto CoCube.
This is the best time to open the file view and see the difference between local files and device files.
-
Open the file view: In the top menu bar of Thonny, choose
View->Files.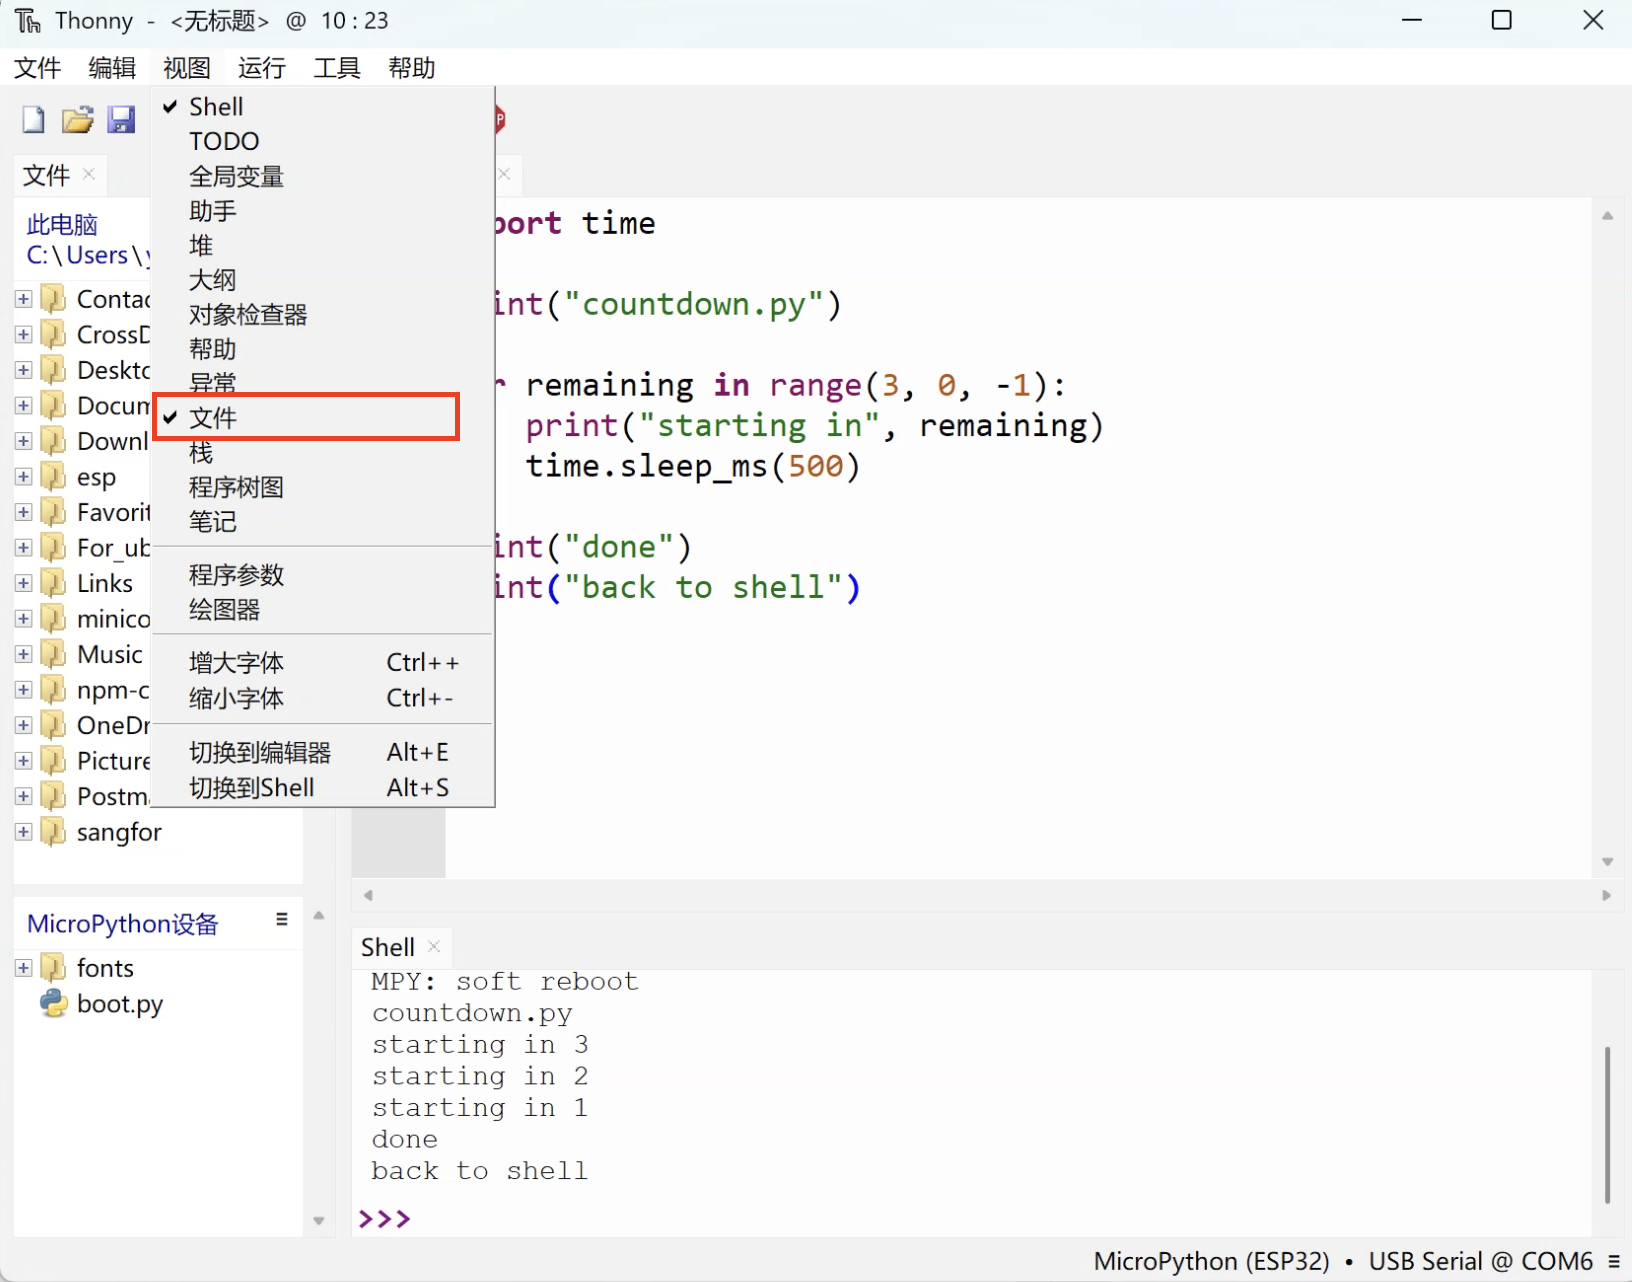
-
Identify the two areas: Two file sections appear on the left.

- Top: local files on your computer
- Bottom: the MicroPython file system on CoCube
Initial fileOn a freshly flashed device, you will often see a
boot.pyfile first.
It is part of the startup flow, and at the beginning you can leave its default contents alone. -
Save the script to the device: Click
Save, then choose MicroPython device.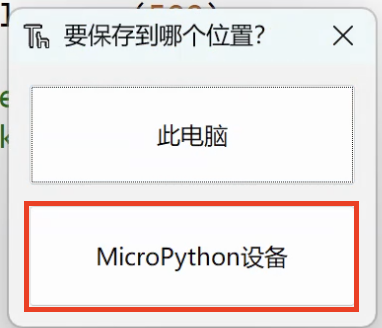
-
Enter a filename: For example,
countdown.py.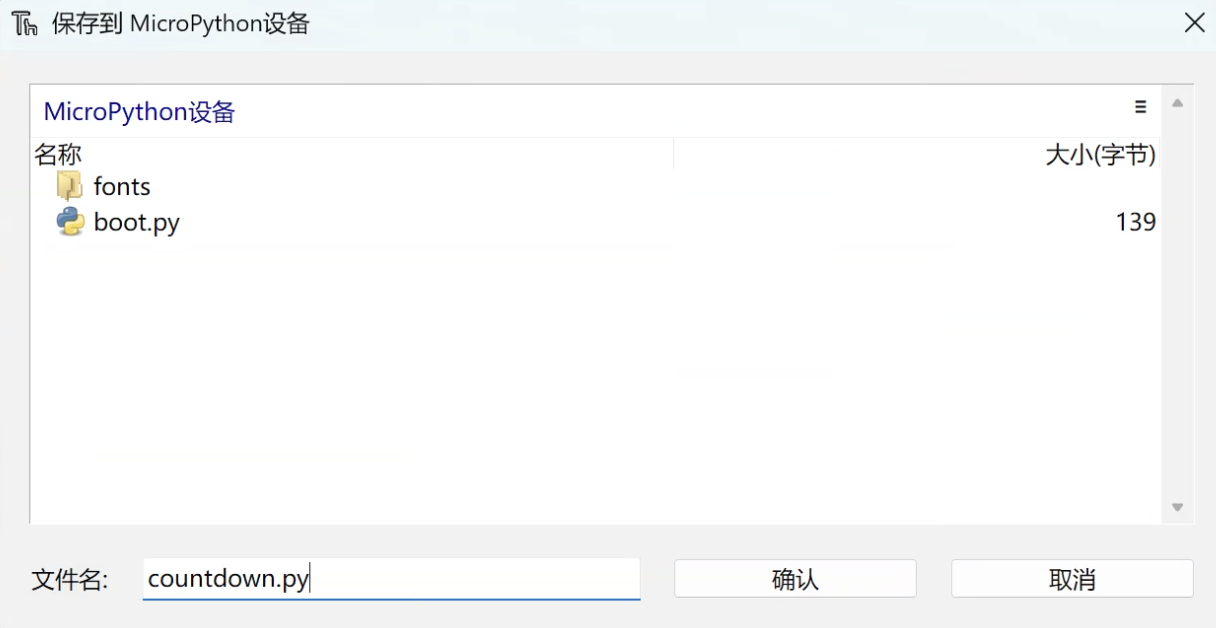
-
Confirm the result: After saving, you should see the script in the device file area.

4. Why do some programs not start automatically after reboot?
Saving a script to the device only means "the file is now on the device."
Whether it auto-runs on power-up depends on whether its filename is main.py.
For beginners, it is enough to remember these three pieces of the startup flow:
4.1 boot.py (boot script)
- Runs first during startup
- Usually contains lower-level initialization
- When you are just getting started, it is best to leave the default content alone
4.2 main.py (main program)
- Runs after
boot.py - This is where your own main program usually goes
- It only auto-runs at power-on if the filename is exactly
main.py
4.3 Interactive interpreter (REPL)
If there is no main.py, or if main.py has already finished running, the interpreter returns to the REPL.
So "saved as a normal script" and "auto-run at startup" are two different things.
5. Make the script auto-run after power-on
If you want the countdown script above to auto-run after the device restarts, save it as main.py.
-
Open the script on the device: In the
MicroPython devicearea, double-click the file you saved earlier.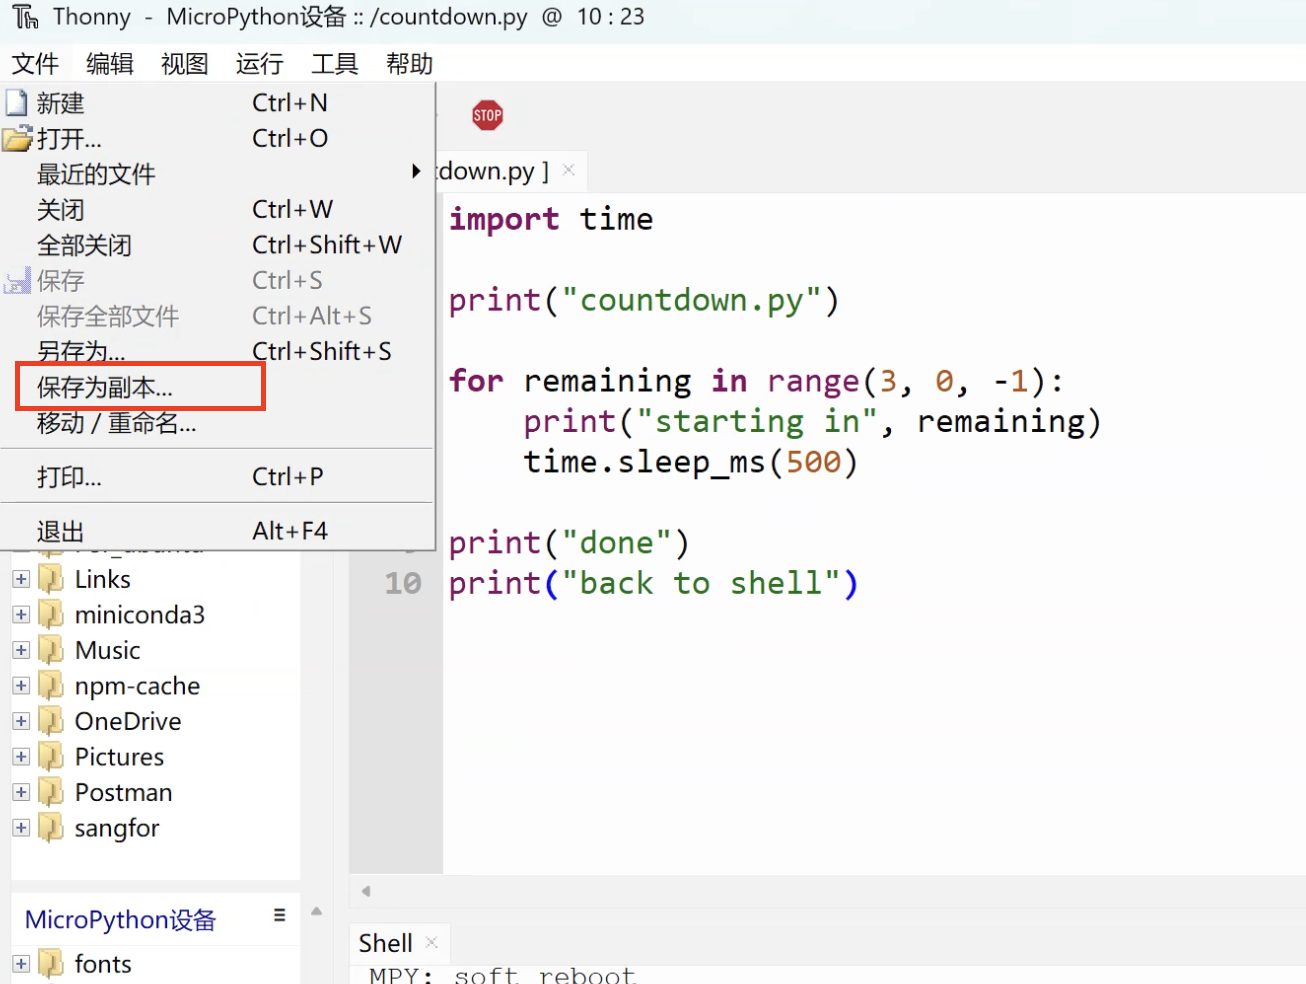
-
Save a copy as
main.py: In the menu bar, clickFile->Save copy, chooseMicroPython deviceagain, and rename the file tomain.py.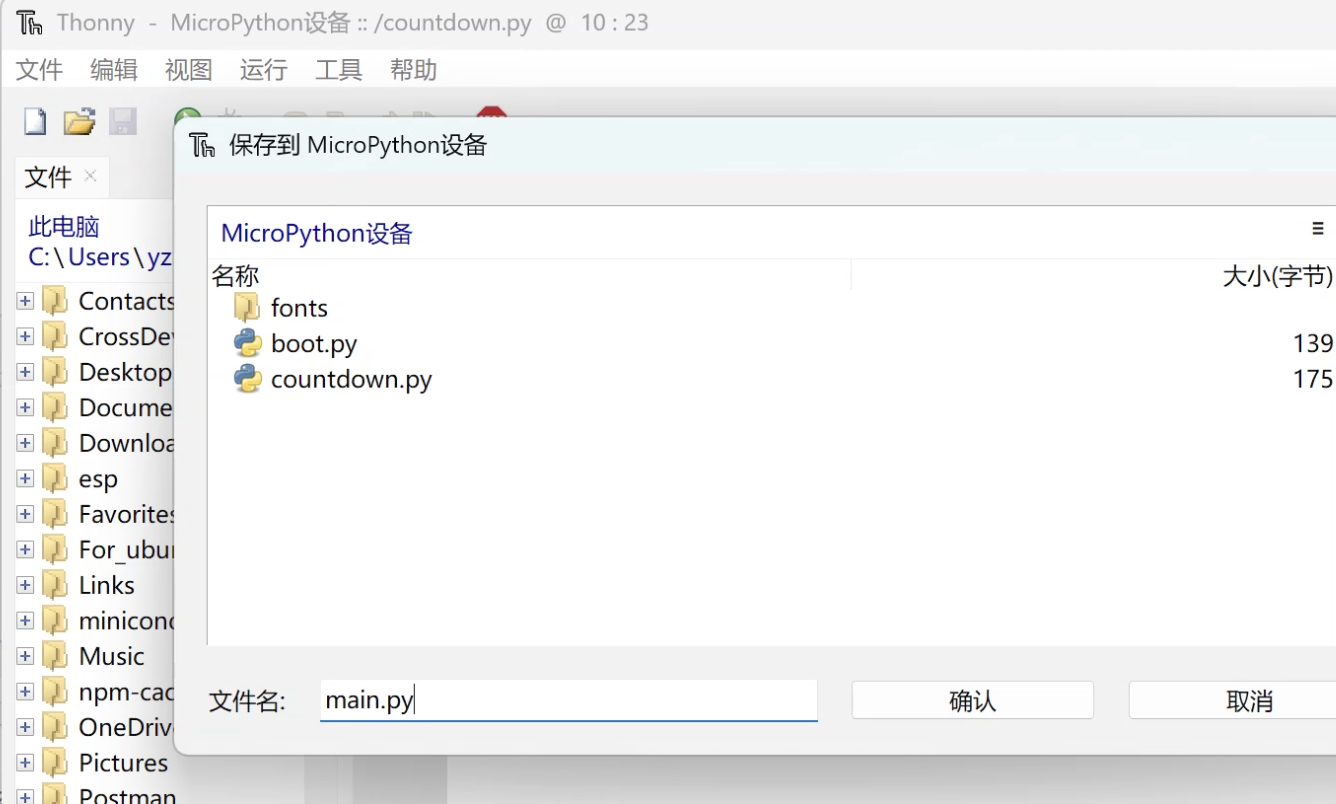
-
Verify it: Press
Ctrl + Donce in the Shell to perform a soft reboot and check whethermain.pystarts automatically.
main.py after connecting?When Thonny connects to CoCube, it interrupts the currently running program by default and enters REPL mode. This behavior can be changed in the settings.
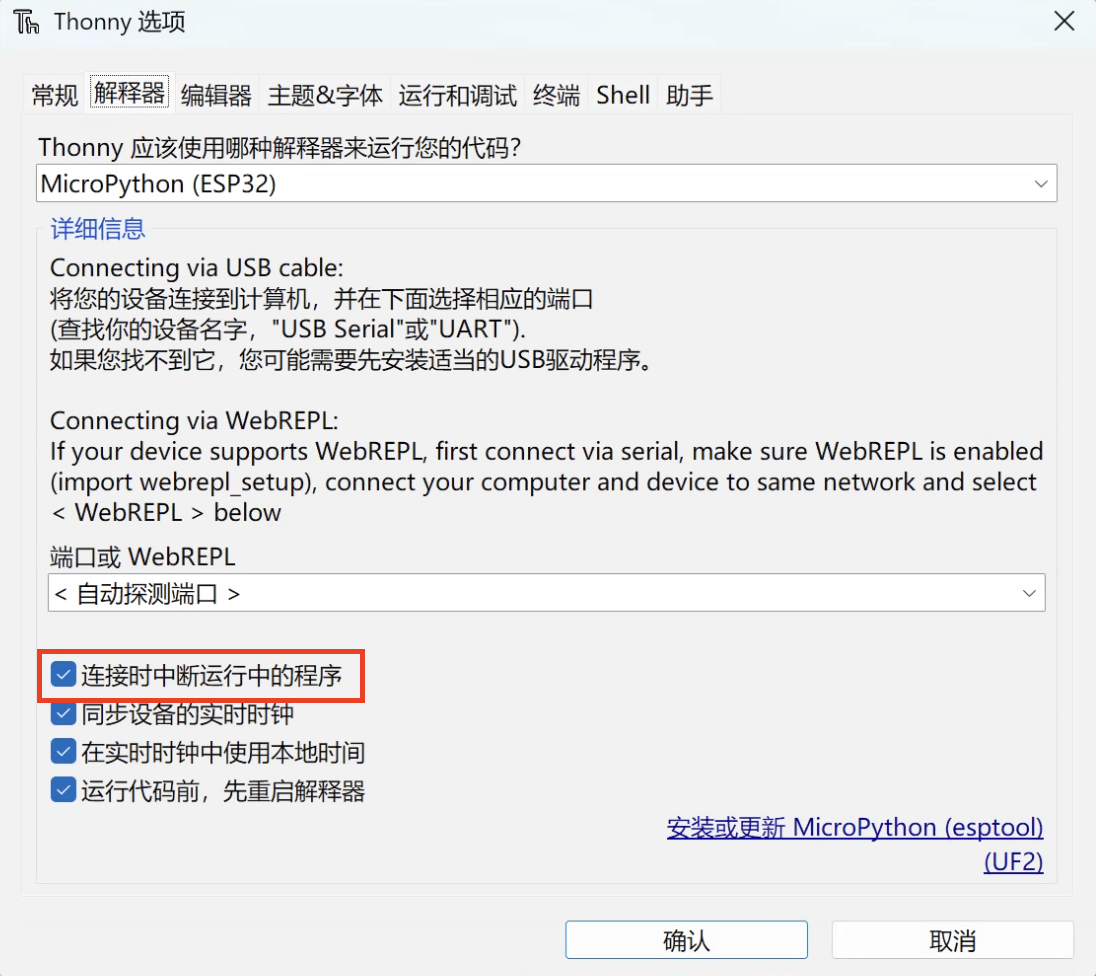
That means even if main.py started automatically when the device powered on, the program may be interrupted as soon as Thonny takes control.
In that case, press Ctrl + D once more to rerun the startup flow while staying connected, which makes it easier to observe main.py from the beginning.
6. When you are unsure, start with these lookup entry points
This page is not trying to explain every built-in module at once.
The important part is knowing where to look first when you are not sure how to use a module or object.
6.1 First, check which modules are in the current firmware
In the Shell, enter:
help("modules")
It lists the module names included in the current firmware.
Different chips and different firmware versions may include slightly different module sets.
6.2 Then inspect what is inside a module
For example, inspect machine:
import machine

dir(machine)
help(machine)
If you want to keep going, you can pass a class or function directly to help() as well.
help(machine.Pin)
6.3 Which kind of document should you check first?
- For general modules: check the core library docs first
- For chip-specific usage: check the ESP32 quick reference first
- For shortcut keys and interactive behavior: check the REPL reference
- For startup behavior: check the boot and reset reference
If you are about to start writing CoCube robot programs, you can also go straight to this site's reference pages for cocube, display, cocube_module, and the camera modules.
7. Reference links
This page is mainly about connecting the most common entry points into one workflow.
If you want to look up APIs or confirm detailed behavior, these are the best documents to start with:
- MicroPython core library documentation
- MicroPython ESP32 quick reference
- MicroPython REPL reference
- MicroPython boot sequence reference
If you are about to start writing the robot code used in the lessons, this site's cocube core reference, display reference, and cocube_module reference are even closer to the lesson code you will run.